How To Apply Heat Transfer Vinyl With An Iron? | Palmgear
by William Sanders
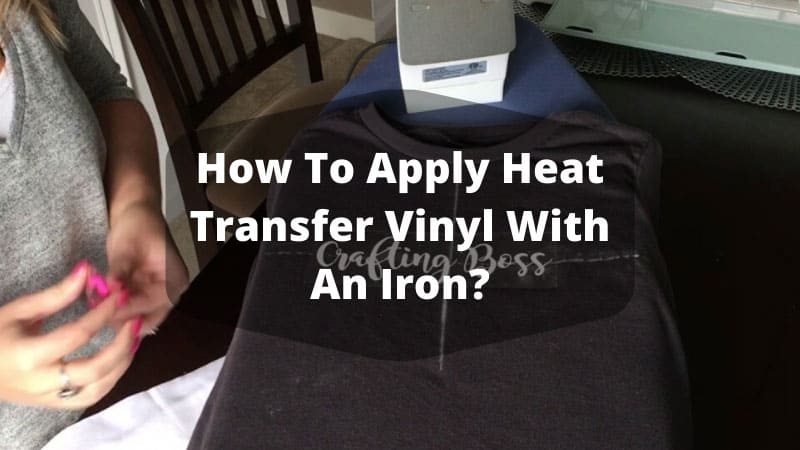
No heat press machine? No problem!
If you want to use heat transfer vinyl to customize your t-shirts and other items but don't have the cash to invest in a heat press machine, you can turn to your household iron to help you do the job.
The iron alternative is easy, fast, and produces quality, long-lasting results-just like the heat press machine itself.
In the following post, we'll show you how to use the iron to apply your image or design or HTV on various items.
Let's do this…
Contents
How To Apply Heat Transfer Vinyl With An Iron?
Things you'll need:
- T-shirt (you can use iron-on n various items, but for this guide, we'll use a tee)
- Transfer vinyl
- Iron
- Teflon sheet or think towel
Steps for applying HTV with Iron

Step 1. Cut and weed the design to be printed.
The first step is pretty obvious as it involves cutting your design with the help of a vinyl cutter. Then, you can weed it to remove excess vinyl that you don't want to appear in your final design.
In the end, you want to be left with your design only at the clear backing of your HTV. Remember that your design should look backward o the HTV because you mirrored it during the cutting process.
Step 2. Preheat the t-shirt area where you'll be applying the design
Next, you'll need to prepare the area of your t-shirt where you'll be aping your design by pre-heating it. Pass the iron over it for around 10-15 seconds to warm it. Make sure you do the same for the back side of the tee as well.
The reason why you'd want to pre-heat your tee is to help eliminate any wrinkles present and to eliminate any moisture that can make the HTV fail to stick firmly to your t-shirt fabric.
Step 3. Place the design on the tee
Now grab your HTV design and place right on your t-shirt, where you want it to appear after it's transferred.
Make sure the clear backing side is up onto the side of the t-shirt where you plan to imprint the design.
Once you have placed the design in place and aligned it correctly, cover it with a thin towel or Teflon sheet (whichever you prefer) and move on to the next step.
Step 4. Apply the HTV with your iron.
Power ON your iron and set it to high/cotton. Once the iron is hot and ready for use, put in on your design, and exert firm pressure. If you want, you can start with light pressure and increase to firm pressure. Be sure to apply the pressure for about 10-15 seconds.

If you're working on a larger design than the iron surface, you'd want to press it, one section at a time, until the entire design gets pressed down.
IMPORTANT: The idea here is to apply pressure (i.e., place the iron on your design and hold), not to move it around. You want to apply heat and pressure, just like what the heat press machine does.
If you make the MISTAKE of moving your iron around, your HTV might start shifting and moving in the undesired locations…not to forget it'll not correctly adhere to the item you're transferring to.
Step 5. Peel off the backing paper.
At this point, you have successfully transferred your design onto your item. The only thing remaining is to carefully remove the clear backing paper either cold or warm.
But BEFORE you do that, we suggest that you first check the instructions on the HTV you're using to see if the manufacturer advises you to do a Warm or Cold Peel.
For starters, this simply means either removing the line while the material is still warm or letting it cool down. Different HTVs have different peeling requirements, so make sure you abide by the manufacturer's instructions.
After pulling the liner off your tee, give the design a1-2 seconds to cool down.
In case your HTV pulls up with the liner, don't panic. Simply place it back on your t-shirt and use the iron to press the area again.
Final Verdict
No heat press? No problem!
That's how you apply heat transfer vinyl to various items with your household iron. As you can easily see from this guide, the process is quite easy and fast, even for absolute beginners.
The best part about this method is that it produces quality and long-lasting results, just like the heat press machine.
Have you started working on your tee already?
 |
 |
 |
 |
|
|
|
|

About William Sanders
William Sanders was born and raised in California. After receiving his Master’s degree in information science from San Diego State University, he started working as a city councilor. In his spare time, William enjoys playing best-selling MMORPG games such as World of Warcraft and Fnal Fantasy, where he often takes on the role of guild leader with hundreds of players collaborating for success under his leadership. William is also a regular contributor to some popular magazines such as San Jose Mercury News, Gleanster Research, and Palmgear.
Leave a Reply
Just Gears and Gadgets
You can get FREE Gifts. Or latest Free phones here.
Disable Ad block to reveal all the info. Once done, hit a button below
|
|
|
|